
Background: Aesthetic augmentation of the skull can now be performed in an almost limitless fashion. This has become possible due to the readily accessible 3D CT skull scanning and the use of computer designing on onlay skull implants. In some ways what had been available for facial bone augmentation has now been extended to the skull. While there are a few standard implants that are currently available for local skull augmentations (temporal and forehead implants) theist majority of aesthetic skull augmentation needs requires custom implant designing given their lager surface areas of coverage.
With custom implant designing almost any form of skull augmentation can be done constrained only by the ability of the scalp’s stretch to accommodate the implant volume placed underneath it. But another challenge is created…how to place such skull inplants without undue scarring. While the bicoronal scalp incision provides unlimited visual access to all areas of the skull and is routinely used in reconstructive craniofacaial surgery, it has a much more limited role in aesthetic craniofacial procedures. Most men in particular are understandably not accepting of that long often visible scar tradeoff.
One of the basic principles of aesthetic craniofacial/skull augmentation surgery is limited scarring. How then can a large surface area coverage skull implant be placed? Much like the proverbial ship in the bottle the implant must be designed in pieces, inserted in separate sections and then reassembled once inside. How the implant design should be sectioned is determined by the location of the placement incisions with thought into how it will be put together once inside the tissue pockets. The following case is a prime example of this large skull implant design concept.

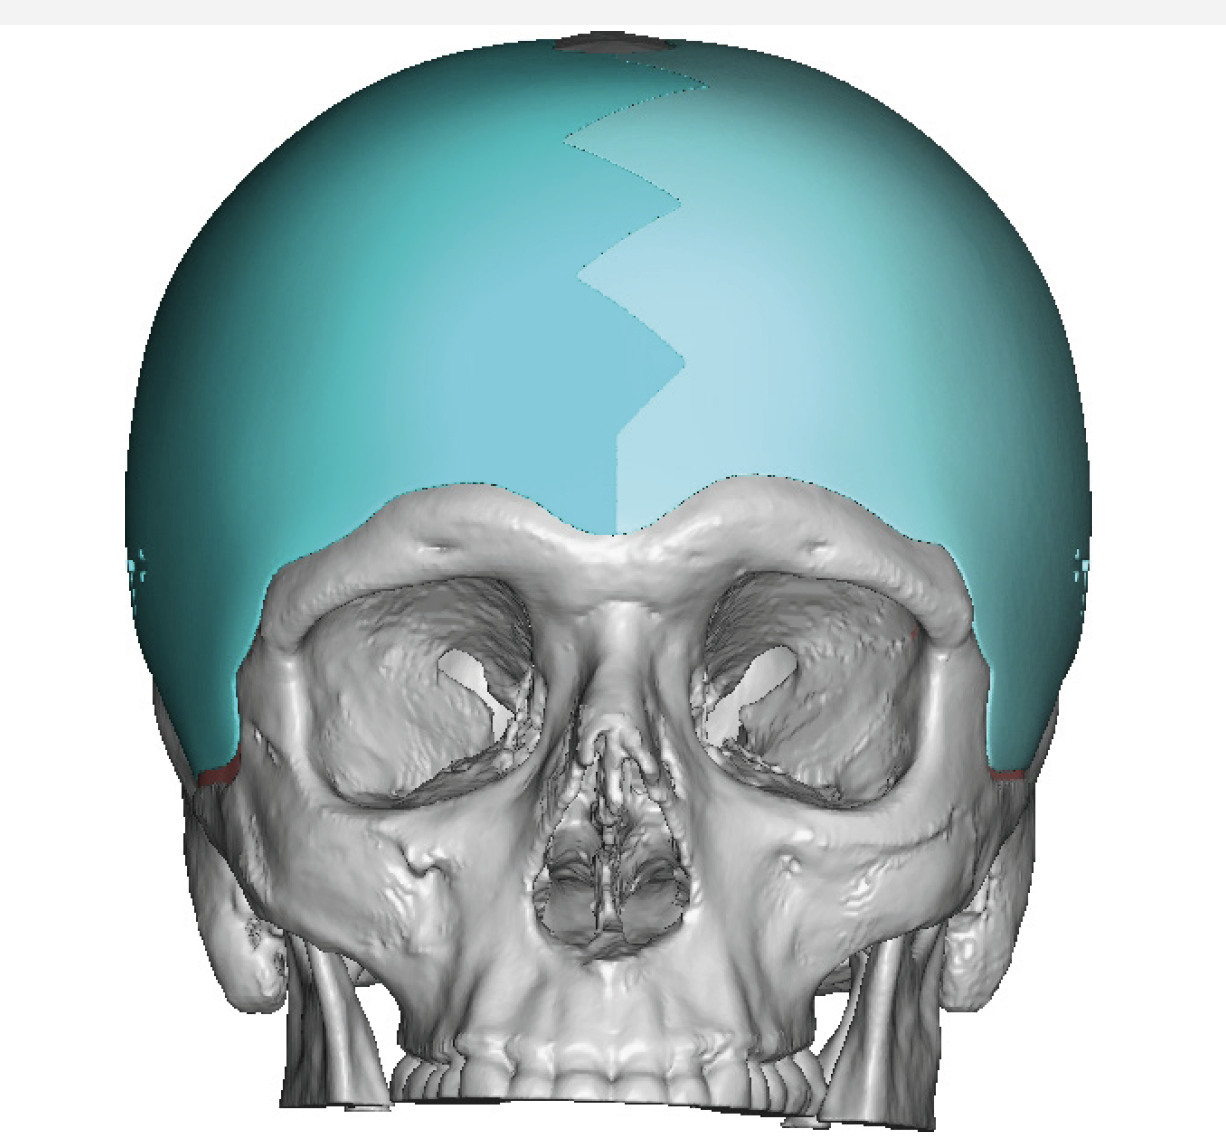
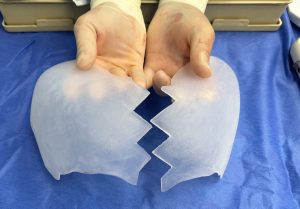
 Case Study: This male desired to widen the sides of his head as well as decrease the slope of his forehead. Two achieve this skull augmentation effect a wrap around implant design was done that crossed the forehead and extended back along the sides of his head to the posterior temporal lines. Given the extent of its surface area coverage it needed to be inserted in two pieces. Thus it was designed with a geometric midline split down the center of the forehead. (the other option was a three piece design with bilateral splits down the sides)
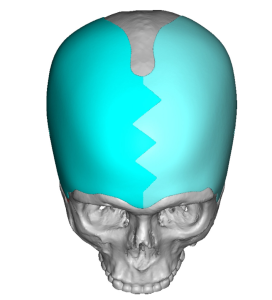 The implant’s total volume was 132ccs…which means it could be immediately placed without the need for a 1st stage scalp expansion.
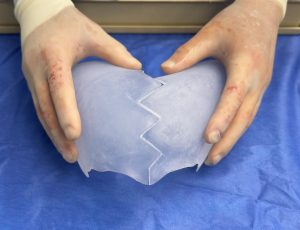 In surgery the two piece implant design could be seen separated and put together in the midline.
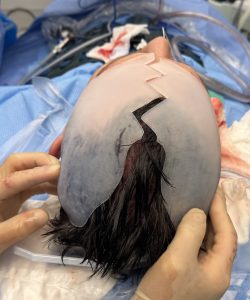
 Under general anesthesia the two piece implant was placed on the patient to see the extent of his head coverage.
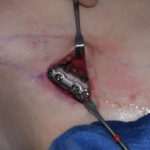
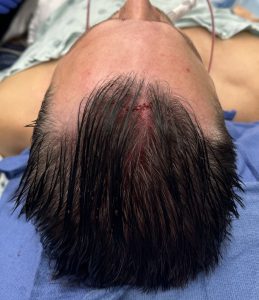
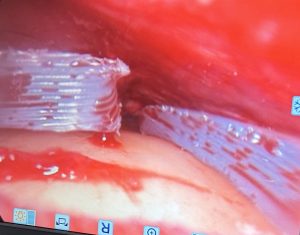 Then through bilateral postauricular sulcus ear incisions combined with a small frontal retro hairline incision the implant pocket was developed at the subperiosteal level on the forehead and bony skull behind it as well as on the deep temporal fascial on the sides of the head. Through the postauricular incisions the implants were inserted and using the frontal incision with an endoscope they were attempted to be joined in the midline. But no matter the effort I could not get them closer down the split line than 1 to 2mms apart. This was unacceptable as even a narrow separation of the split would eventually result in a visibility of the implant separation.
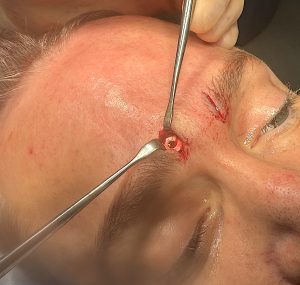 To overcome the midline implant split an ePTFE 1mm thick implant was placed over it, aided by bilateral inner eyebrow incisions to ensure complete coverage and microscrew fixation of both sides of the implant.
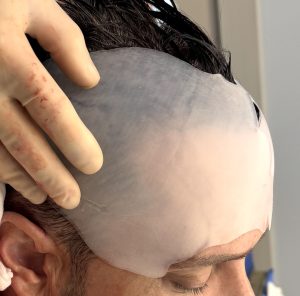
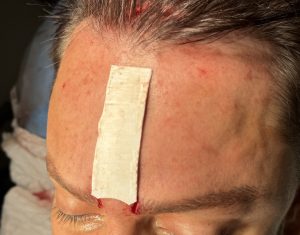
 With all incisions closed with small resorbable sutures the two piece skull implant could be seen in place.

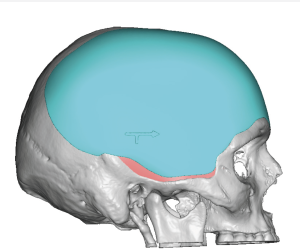
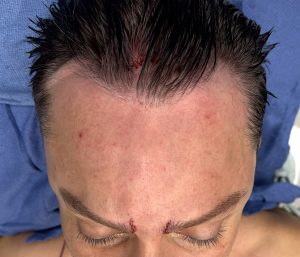
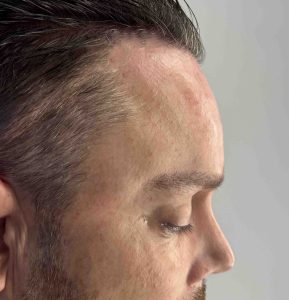 In profile the change in his forehead slope could be seen as well.
This is a large surface area coverage skull implant which one would think that it could only be placed though a coronal scalp incision. But as seen in this case example that incisional approach can be avoided through a two-piece implant design. It also works because the implant is flexible permitting its shape to be changed for introduction through small remote incisions. It also works in head widening implants, contrary to the perception of some, that the implant needs to placed on top of the temporal fascia and not beneath it or the muscle. The continuous plane of placement goes from the frontal bone over onto the fascia is what makes one smooth augmented contour change.
Usually getting the implant together along the midline forehead split is not a problem. But in this overall thin implant (maximum thickness of 6mms) it just would not slide completely together. Coverage of the open implant split was essential and a 1mm ePTFE implant works well to do so with not visible edging.
Key Points:
1) Widening of the side of the head and forehead augmentation can be done by a combined wrap around skull implant covering more than two thirds of he circumference of the skull.
2) Such a large skull implant must be designed into at least two or more pieces for placement through limited incisions.
3) Placement of the two-piece skull implant design is introduced through postauricular incisions aided a small central frontal hairline incision for implant positioning.
Dr. Barry Eppley
World-Renowned Plastic Surgeon