

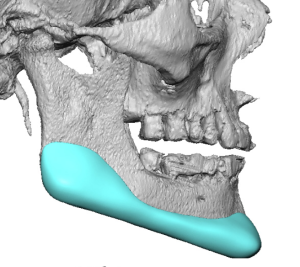
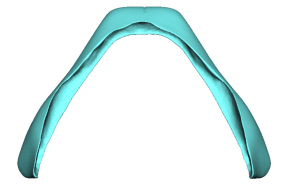
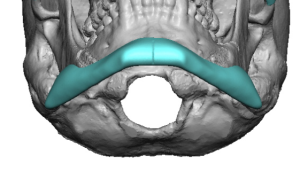
 Designing an aesthetic total custom jawline implant (angle ? body ? prejowl/chin transition) is fundamentally about creating a continuous mandibular border with controlled width, projection, and symmetry while respecting soft-tissue behavior and anatomy. The best results come from designing the implant as a global lower-face framework, not isolated angle or chin augmentation.
Below are the core aesthetic design principles I use in this type of custom implant:
1. Think of the jawline as one continuous structure
A common mistake is designing separate chin and angle implants. Aesthetic jawline implants should behave as a single continuous contour.
Key zones to design together:
- Posterior mandibular angle
- Angle-body transition
- Mandibular body
- Prejowl region
- Chin transition
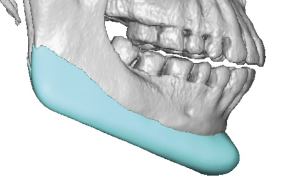 The inferior border should appear smooth and uninterrupted from the gonial angle to the chin.
Goal:
A straight, crisp mandibular line in oblique, profile and frontal views.
2. Define the aesthetic goal before designing the implant
With the premise of ‘You can’t hit a target you don’t have’ know what the patient’s precise aesthetic goals are before you start implant designing. Imaging of the patient’s pictures to determine their aesthetic desires is critical. While there are general types of jawline implant designs, as listed below, you have to put those into context for each patient.
Typical design targets:
Masculine jawline
 Strong angle flare
- Straight inferior border
- Wide posterior mandible
- Square chin transition
 Strong angle flare
Feminine jawline
- Minimal angle flare
- Softer angle
- Narrower lower face
- Smooth taper to chin
 Minimal angle flare
Structural correction
- Asymmetry correction
- Prejowl deficiency
- Mandibular body deficiency
The implant must reflect facial harmony, not just jaw size.
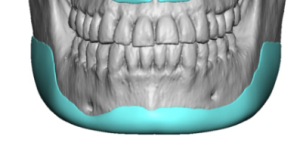
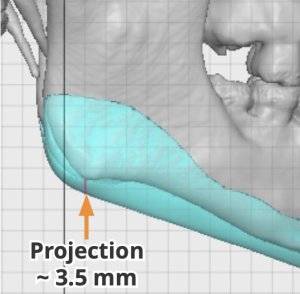
3. Posterior width is the primary driver of masculinity
 The gonial angle width largely determines jaw strength.
Design considerations:
- Increase lateral projection
- Maintain smooth transition into ramus
- Avoid abrupt bulges
- Do not extend above masseter border excessively
Typical design thinking:
• Mild: +3–5 mm
• Moderate: +5–8 mm
• Strong: +8–12 mm
But width should scale with zygoma width and face size.
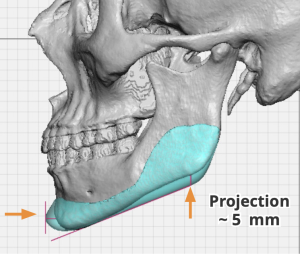
4. Vertical drop of the mandibular angle
Vertical augmentation is often more important than lateral width for some patients.
Angle drop creates:
- a sharper jaw angle
- a stronger lower border
- better profile definition
 Typical vertical augmentation:
• 2–6 mm
Overdoing this creates a heavy or aged lower face. Also the more you increase the vertical drop the risk of postoperative masseter muscle dehiscence increases.
5. Maintain a straight inferior mandibular border
A well definemd jawline has a linear inferior border.
Poor designs create:
- dips in the body
- step-offs near prejowl
- uneven contour between segments
The implant should:
• straighten the inferior mandibular body
• connect angle to chin smoothly
• avoid “segment appearance”
 This is the defining feature of total jawline implants.
6. Jaw angle shape is critical
Most natural bony jaw angle shapes are rounded, not square. The jaw angle is formed from the intersection of the posterior and inferior border lines, not at the actual intersecting point of these two lines
Total jawline implants should:
- closely mimic the natural bony jaw angle shape.
- avoid expanding the gonial angle area posteriorly
- square shapes may create implant show
 Respect the natural shape of the bony jaw angle. Expanding it to an unnatural angular shape may cause masseter muscle coverage problems.
7. Chin transition must be smooth
Even if a separate chin implant exists, the jawline implant must blend into the chin contour.
Design rule:
![]() No visible contour break at the chin junction.
No visible contour break at the chin junction.
Options:
- integrate with chin implant
- overlap chin implant
- design single wraparound implant
8. Respect anatomical boundaries
Critical structures:
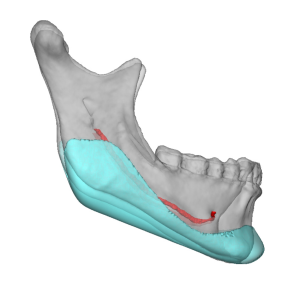 Mental nerve
- exits near premolar region
Inferior alveolar canal
Tooth roots
Implant design should:
• avoid nerve compression
• maintain safe screw fixation zones
• avoid excessive bulk superiorly in thin mucosa regions
9. Wide bone contact improves stability
Good implants have:
- large contact surface
- intimate fit to bone
- anti-rotation geometry
Advantages:
• better stability
• reduced movement
• improved screw fixation
 Custom implants outperform stock implants largely because of this precise fit.
10. Thickness tapering prevents palpability
 Implants should feather into bone at the edges.
Avoid:
- sharp implant borders
- palpable transitions
- soft tissue bulging
Good design uses:
• gradual taper
• smooth blending edges
11. Symmetry correction should be deliberate
Many patients have some dehree of mandibular asymmetry particularly at the jaw angles.
A custom implant can:
- widen one side more
- drop one angle
- correct mandibular cant
Mirroring the opposite side blindly can worsen asymmetry by overcorrection.
12. Soft tissue response matters
Soft tissue does not translate 1:1 with bone augmentation.
Approximate effect:
• 50–80% of skeletal change visible externally, varies by facial region
Design must consider:
- skin thickness
- masseter thickness
- fat distribution
13. Avoid excessive anterior widening
Over-widening the mandibular body and chin can create:
- square lower face
- unnatural fullness
- heavy appearance
 Most width augmentation should occur posteriorly near the angle.
14. Implant fixation planning
Fixation should be designed during CAD planning with certain maaterials.(PEEK, and titanium) as self drilling screws are used in most implants when possible. Solid silicone does require predetermination of screw location.,
Typical:
• 1-2 screws per each jaw angle
• 1-2 screws in chin
Screw holes must avoid:
- mental nerve
- tooth roots
- mandibular canal
15. Implant material considerations
Available materials:
 Solid Silicone
- firm but has flexibity which aids placement
- will feel just like bone when on bone
- easily seen on 3D scans
- alloows for any implant design to be placed
- has the best feathered edges
- most economical
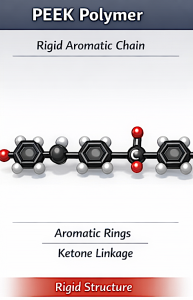 PEEK
PEEK
- rigid plastic polymer material
- due to rigidity must be designed and placed as 3 or 4 separate pieces
- lightweight
- not easily seen on 3D scans
- larger designs may prohibit effective placement
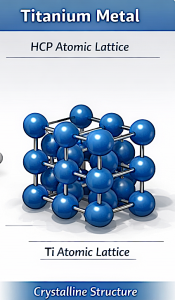 Titanium
- rigid metal construct
- due to the rigidity usually limited to smaller implant designs
- easily seen on 3D scans
- most espensive
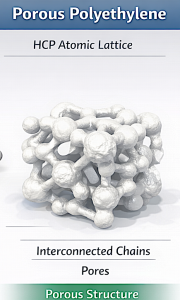 Medpor/Omnipore (Porous Polyethylene)
- rigid material
- must be designed and placed in pieces
- not easily seen on 3D scans
- can be very difficult to remove/revise due to tissue ingrowth
Material choice often depends on surgeon/payient preference and implant size. But it is very important to understand that all materials are not created equal. They do not perform equally.
There is as of yet no perfect facial implant material. Each implant material has its advantages and disadvantages
Key design philosophy
While custom implant designing may seem like an art form there is a learned science to it.
The most important concept:
A beautiful jawline is about contour continuity, not implant size.
Aesthetic success depends on:
• smooth mandibular border
• correct posterior width
• controlled vertical angle drop
• prejowl correction
• seamless chin transition
Dr. Barry Eppley
Plastic Surgeon