

Custom skull implants are the definitive treatment for elective aesthetic skull augmentations. Besides the surface area coverage, shape and thickness of the implant the other important consideration is the capacity of the scalp to accommodate it. This is based on how much the scalp can stretch which varies amongst patients based on the thickness of its layers. The initial consideration may seem to be able to competently close the scalp incision over or near it. (prevent postoperative wound dehiscences and implant exposure)
But the more relevant consideration is to not stress the overlying hair in the scalp and prevent shock (temporary) or even permanent hair loss. This is usually of greater relevance in females than men who may have a shaved head or genetic hair loss. But it is also because women usually request greater overall skull implant volumes and often have thinner scalps.
While a good general skull implant volume guideline is to not exceed more than 150ccs of material volume this must be determined on an individual basis. But when it is determined that the implant volume exceeds the scalp’s ability to safely contain it, this is the role of a two stage skull augmentation process. The first stage is the placement of a scalp expander to create adequate space under the scalp followed months later by the placement of the designed skull implant.

 Most scalp expanders in two stage skull augmentations are placed on the upper back/crown/top of the head through a small posterior scalp incision done in the prone position. In patients with hair it is parted in an irregular zigzag fashion and no hair is shaved. The placement of the incision can not be over the implant and must be below any of its edges or the the incision will get stretched or separate.
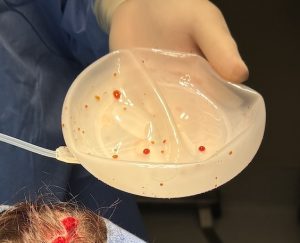
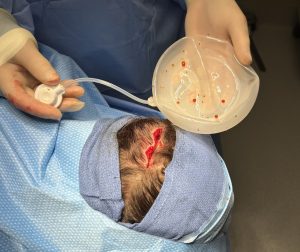 The most commonly used scalp expander is round with a remote port. The biggest possible expander should be used that can fit which is usually 13 to 14cms in diameter.
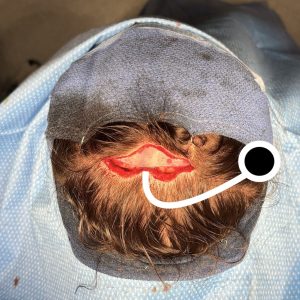 The expander is rolled into a burrito form which allows it to be inserted through such a small scalp incision. Once inserted it is unrolled inside digitally. The remote port initially remains on the outside. Once the expander is fully unrolled and positioned then a new pocket is made for the port inferior to the incision and over towards the right ear. (if the patient is right handed…left ear if the patient is left handed) The port ends up being buried under the scalp above the ear. This makes it easier for the patient to self-inject.
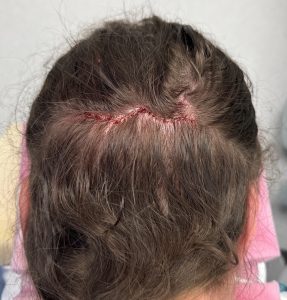 The scalp incision is closed in two layers with dissolvable sutures. No initial fluid is injected into the expander. A head dressing is then applied and removed the next day.
Initial scalp expansion are begun one week later at 10cc every 2 or 3 days. The goal is to achieve an expander volume that is equal to that of the designed skull implant. The time between the tissue expander surgery and its skull implant replacement is based on the time needed to achieve this volumetric expansion.
When the scalp is tight/limited in stretch a scalp expander can overcome this skull implant limitation. Besides being able to make the implant fit it can also protect against the risk of shock hair loss. The unfulled scalp tissue expander has as volume of 26 to 30ccs so it can always fit into a tight scalp.
 One issue to be aware of is that the tissue expander is round while skull implants are usually oblong in shape. Thus when the tissue expander gets significantly filled it will not have the shape of the implant nor is it reflective of the implant’s final result. The tissue expander is creating space, the space does not need to have the exact shape of the implant to be effective.
Dr. Barry Eppley
World-Renowned Plastic Surgeon