
There are two factors that determine the success of custom facial implants, the implant design and its intraoperative placement. The implant design is assured, as it is seen and chosen before surgery, but placing the implant(s) exactly how it is designed is not. Such implants can end up a few millimeters off or more from ideal placement. A few millimeters doesn’t sound like much, but on the face it’s usually visible. What’s interesting is that the ways in which the implant can be misplaced are pretty predictable—and they differ by facial region and implant type.
I’ll break it down by what goes wrong ? why it happens ? how I try to prevent it.
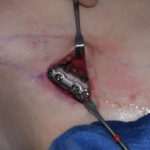
Chin (Mentum)
Common ways it ends up off
1. Midline shift (left/right)
- Implant sits slightly off the true facial midline
- Even 1–2 mm is noticeable
Why it happens
- Dental midline ? skeletal midline (very common)
- Soft tissue tension pushes it during fixation
- First screw placed slightly off-center ? “locks in” error
Prevention
- Mark true bony midline (not just teeth)
- Measure from bilateral landmarks before fixation
- Place a single central pilot screw, re-check symmetry, then finalize
2. Vertical misplacement (too high or too low)
- Too high ? looks short or under-projected
- Too low ? can create a “heavy” or ptotic look
Why it happens
- Incomplete dissection along the inferior border
- Soft tissue trapped under the implant
- Surgeon being cautious around the mental nerve
Prevention
- Full exposure of the inferior border
- “Rock test” to ensure it’s fully seated
- Palpation along the entire lower edge before fixation
3. Rotation (one side forward/back more than the other)
- Creates asymmetry in projection
Why it happens
- Uneven pocket
- Fixing one side first without checking the other
Prevention
- Temporary fixation – check – then final screws
- Visual + palpation symmetry check from multiple angles
Jawline (Mandibular angle/body)
This is where small errors happen most often because the implant is long.
Common ways it ends up off
1. Rotation along the length (the “twist” problem)
- Angle looks good, but the body is slightly rotated outward/inward
Why it happens
- Long implants have multiple degrees of freedom
- Fixing one end first can introduce torque
Prevention
- Start fixation at a key anchor point (often angle)
- Then align the rest before placing additional screws
- Check inferior border smoothness end-to-end
2. Posterior misplacement (angle too forward or back)
- Changes the apparent width and sharpness of the jaw angle
Why it happens
- Limited visibility at the posterior mandible
- Incomplete dissection around the angle
Prevention
- Ensure full release around the angle and posterior border
- Use endoscopic visualization in harder cases
- Palpate externally to confirm angle position
3. Inferior border mismatch (step-off or uneven contour)
- You can feel or see a discontinuity along the jawline
Why it happens
- Implant not fully seated along the entire border
- Soft tissue interposition
- Slight mismatch in curvature vs. bone
Prevention
- Continuous palpation sweep along the jawline
- “Rock test” at multiple points (not just one)
- Adequate subperiosteal pocket dissection
4. Vertical asymmetry (one side slightly lower)
- One side of the jaw looks heavier or longer
Why it happens
- Small differences in how each side is positioned before fixation
- Reliance on visual symmetry in a limited surgical view
Prevention
- Measure from fixed landmarks (e.g., gonial angle to reference points)
- Compare both sides before final screw placement
Cheek (Malar/Submalar)
This is the most technique-sensitive area.
Common ways it ends up off
1. Too lateral vs. too medial
- Too lateral – “over-wide” – artificial look
- Too medial – underwhelming or flat result
Why it happens
- Broad, smooth bone p- no hard “stop” points
- Pocket allows more freedom of movement
Prevention
- Use specific landmarks (zygoma, infraorbital rim relationship)
- Frequent external palpation to feel projection
2. Too high vs. too low
- Too high – unnatural fullness near the lower eyelid
- Too low – saggy or bottom-heavy cheek
Why it happens
- Limited visual reference internally
- Over- or under-dissection of the pocket
Prevention
- Careful pocket design that matches implant footprint
- Check position relative to infraorbital rim and malar eminence
3. Anterior–posterior misplacement
- Changes how “projected” vs. “flat” the face looks
Why it happens
- No clear anterior boundary
- Implant can slide before fixation
Prevention
- Temporary fixation or manual stabilization before screws
- Compare side-to-side projection manually
4. Asymmetry between sides
- Most common issue in cheek implants
Why it happens
- Natural facial asymmetry + low constraint anatomy
- Each side placed independently
Prevention
- Constant side-to-side comparison
- Use of sizers or mirrored planning
- External visual + tactile checks repeatedly before fixation
Big picture pattern
Across all areas, the same root causes show up:
Why implants end up a few mm off
- Incomplete or uneven subperiosteal dissection
- Soft tissue trapped under the implant
- Fixation done too early or asymmetrically
- Over-reliance on visual judgment in low-visibility areas
- Anatomy that lacks strong positional constraints (especially cheeks)
How I systematically strive to prevent it
Follow a consistent sequence:
- Create a precise pocket (this is half the battle)
- Seat and test (rock test, palpation)
- Align using landmarks + measurements
- Temporary fixation
- Re-check from multiple angles + both sides
- Final rigid fixation
One subtle but critical insight
Most “few millimeters off” problems are not implant design failures—they’re:
- pocket/dissection issues
- fixation sequence issues
- or symmetry judgment errors
That’s why experience matters more in:
- cheek implants (highest variability)
- then jawline
- least in chin
Dr. Barry Eppley
Plastic Surgeon