
 The need for extra or more scalp tissue may be necessary for a variety of aesthetic procedures such as large augmentative cranioplasty (skull buildups) and significant hairline lowerings. (forehead reduction) This is in addition to reconstructive procedures for coverage of scalp defects and removal of scalp tumors. The use of tissue expanders works exceptionally well for the scalp because the underly firm skull bone allows all the expansion to be completely transferred to the overlying scalp tissue.
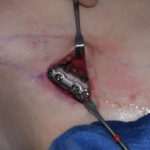
All adult patients and occasionally some children may have scalp tissue expanders in which the injection port is internal. Most patients can do their own tissue expander injections at home which is a simple and quick procedure to do. The port or dome of the expander will have been placed in a visible area to make it easy to find and visualize for injection. Here are the step by step instructions for doing at home scalp tissue expander injections.
1) Necessary supplies (which will be provided) include: 100cc bags of normal saline, 25 gauge injection needles, 18 gauge withdrawal needles, alcohol wipes, 10cc syringes and plastic bag or container.
2) Remove 100cc bag of normal saline from packaging (outer plastic bag).
3) Attach 18 gauge needle to 10cc syringe by twisting needle onto syringe.
4) Open alcohol wipe and wipe white port on bag of normal saline.
5) CAREFULLY remove cap from needle. Holding the bag of saline with one hand and gently squeezing so the fluid is at the bottom of the bag nearest the port, use your other hand to insert the needle (attached to the syringe) into the white port of the saline bag.
6) Once the needle is inserted into the bag, gently draw back the plunger on the syringe until 10cc of fluid has filled the syringe. Gently remove the needle from the bag and CAREFULLY slide the needle back into the cap.
7) After placing the needle back in the cap, twist the needle to remove it from the 10cc syringe. Collect all needles (once opened and used) in a plastic bag or container.
8) Attach 25 gauge needle to 10cc syringe by twisting needle onto syringe.
9) Using your alcohol wipe, cleanse skin where Expander Port is located.
10) CAREFULLY remove cap from needle. Holding the syringe perpendicular to the port, gently insert the needle into the port. (The needle will meet the resistance of the metal plate in the port once inserted.) It is deeper than you think. Don’t inject until you feel the metal on metal.
11) Gently push the plunger of the syringe and begin injecting the saline to fill your expander.
12) Once 10cc of saline has been injected into your expander, gently remove the needle from the port and CAREFULLY slide the needle back into the cap. Remove the needle from the syringe by twisting and place into the plastic bag or container.
13) Discard your used syringe and alcohol wipe into the trash.
14) Once you have finished with all of your injections, please return your needles to the office so we may safely discard them for you. They should not be discarded in the regular trash.
Ten (10ccs) of saline can usually be added to the expander quite easily and without any discomfort in the beginning. When the expander becomes more filled, towards the end of the inflation period, reducing to 5ccs may be more comfortable.
How much saline is needed to fill the expander and the frequency of the expander injections will depend on scalp expander size and the amount of scalp tissue needed. Usually 200cc scalp expander sizes are needed and most patients have a minimum six week expansion period. Since some fluid is placed into the expander at the time of its insertion (usually 25ccs), enough time is needed to instill around 150ccs of fluid. Thus, expansion injections should be done every 3 to 5 days.
Dr. Barry Eppley
Indianapolis, Indiana