
Background: Enlargement of the skull or head shape is most commonly done for select areas using a custom skull implant made from the patient’s 3D CT scan. Such subtotal skull augmentations can usually be done with immediate insertion due to the natural stretch of the scalp. But in larger custom skull implants, whether it is a select skull implant that has a large volume due to its projection or a skull implant that has a large surface area of coverage (near total or total skull augmentation) the stretch of the scalp will be inadequate to contain it and get a competent scalp incision closure over it.
As a result large custom skull implants (those that exceed 150 to 175ccs in volume for most patients) requires a two stage process with a first stage scalp expansion. By placing an initial scalp expander it can be slowly inflated to reach the design volume of the implant. This is an important distinction from how scalp tissue expanders have been historically used in scalp reconstruction where their use is very visible and temporarily aesthetically deforming. Conversely the scalp expander for skull implants, since it matches the designed implant volume, is not as visible or aesthetically deforming.
Besides requiring enough scalp tissue to cover it large custom skull implants have another need…how to get such a large implant through a scalp incision as small as possible. While a larger scalp incision, like a coronal type, can always be used the goal is to avoid a long scalp scar. To do so require an innovation in the implant design.
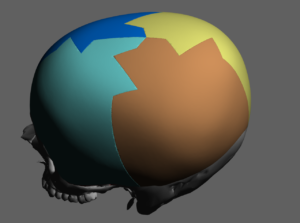
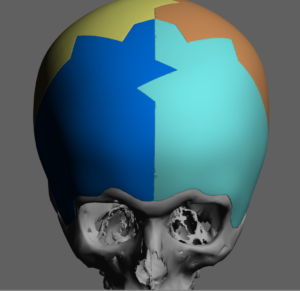
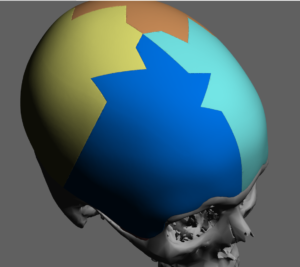
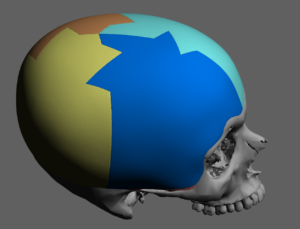 Case Study: This male desired an overall skull augmentation effect from the forehead to the occiput as well as along the temples. A custom skull implant was designed to do so with a volume of 220ccs with the thickest projection over the crown of the head. Preparing for placement it was designed into four pieces with an interlocking design.
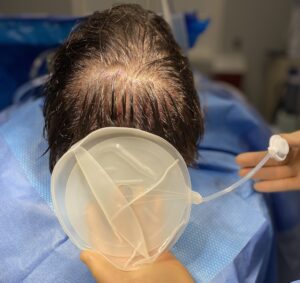
 In preparation for the placement of this large skull implant a scalp tissue expander was initially used. He was able to inflate it to 260cc volume.
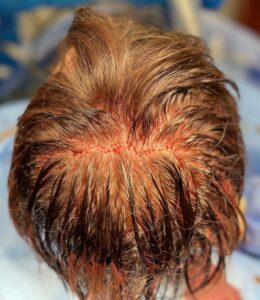
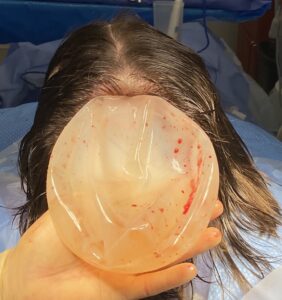 Three months later in a second procedure the scalp tissue expander was removed through the same incision. The entire scalp was elevated off the bone of the skull and fascia of the temporal muscles after removing the capsule from the bone and releasing the capsule from the expander in a circumferential manner.
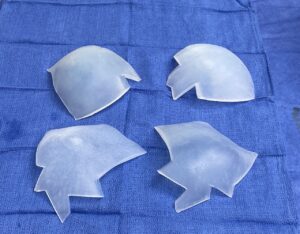
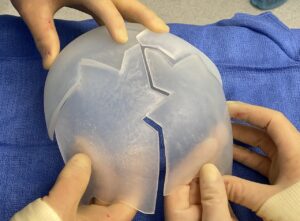 The custom skull implant was opened onto the surgical field and then assembled in the proper configuration. The central intersection of the four corners of the implant was marked with a 4mm hole in each piece to help with realignment once inside the patient.
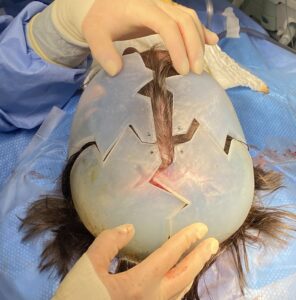
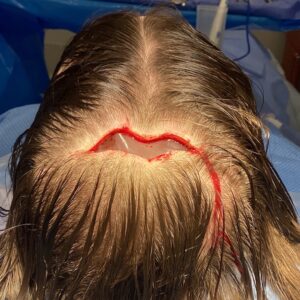
 The value of a segmentalized approach can be seen given the size of the existing scalp incision. The implant was passed through the incision in four sequential pieces starting at the thicker two back pieces. Once all four pieces were inside they were reassembled per their design, all seams checked for smoothness and stabilized by a 2 x7mm self-tapping screws in each the four corners.
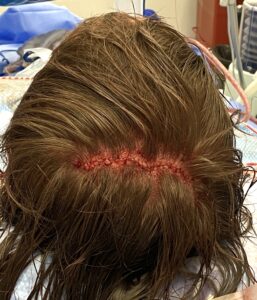 The scalp incision was closed over the implant with two drains using a two layer closure.
Case Highlights:
1) Large custom skull implants will require a first stage tissue expansion if the volume exceeds the stretch capabilities of the scalp.
2) The interval between scalp tissue expander insertion and the placement of the skull implant is usually 2 to 3 months.
3) To keep the scalp incision small a segmentalized approach two the design and placement of the custom skull implant is used.
Dr. Barry Eppley
World-Renowned Plastic Surgeon