
Background: The most effective method of aesthetic skull augmentation is a custom implant approach. By preoperative design using the patient’s 3D CT scan, a smooth surfaced implant with the desired surface area coverage can be made. The most difficult decision in the design of a custom skull implant is its volume. How big should the implant be to create the desired effect? And of equal importance, can the patient’s scalp stretch to accommodate the implant’s volume?
The most significant concern that I think about in every skull augmentation patient is to get to surgery, put the implant in and then not be able to close the incision over it. Or the scalp incisional closure is so tight that the wound may separate some time after surgery. Should that intraoperative event occur it is possible to reduce the thickness of the skull implant by hand modification. But carving down a large convex implant surface is time consuming and, more importantly, impossible to re-establish the smooth implant that comes from the manufacturer.
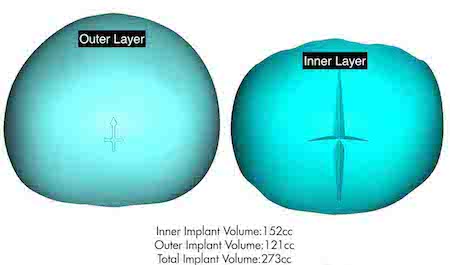
A design method to address this potential concern in certain patients is to make a two-layer implant design. With this approach should the implant be too big the outer layer is detachable leaving a smaller but smooth implant underneath it.
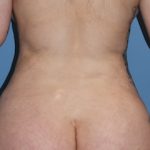
 Case Study: This Asian male presented for occipital augmentation as he always felt the back of his head was too flat and broad. He had prior surgeries consisting of a forehead augmentation as a first stage to reshaping his skull. His forehead augmentation was done using a very posteriorly positioned coronal scalp incision which was located at the upper occipital region. His posterior temporal lines were very prominent and were shaped almost at right angles, consistent with a flat back of the head.
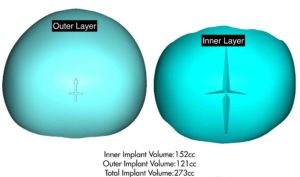
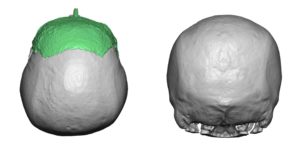
 Using his 3D CT scan a custom occipital skull implant was designed to add increased projection to the back of the head. Given the concerns of scar from the prior surgeries and the uncertainty of the competency of the scalp closure a two layer implant design was done. By this approach should the total implant not fit, the outer layer could be removed leaving the smaller inner implant layer. There was a notching pattern inset into the inner layer by which the outer layer had a matching ridge on its under surface to align and fit the two together.
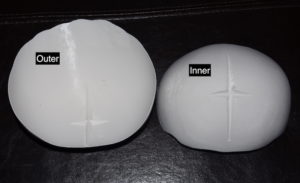
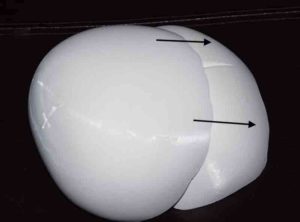
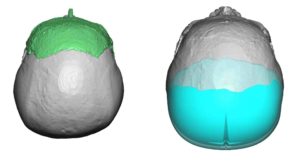
 How the two layers interlock is seen in these 3D printed plastic models of the custom skull implant.
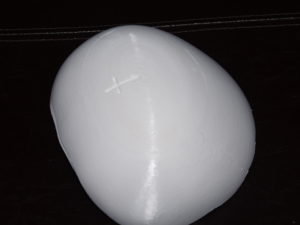
Unde general anesthesia and through his existing coronal incision the occipital scalp flap was raised. As it turned out only the inner layer of the scalp implant would fit despite multiple gall releases and extensive scalp flap undermining on both sides of the incision.
This unique two layer skull implant design offers an easy intraoperative salvage position should the implant volume exceed the capacity of the scalp incisional closure. This type of implant design could also be used in cases where a staged skull augmentation approach is needed. Instead of a first stage tissue expander the first layer of such a skull implant could be placed and the second layer added on three to six months layer when the scalp has acquired additional stretch.
Case Highlights:
1) The biggest unknown in custom skull implant augmentation is how much stretch the scalp can do to accommodate the size of the implant.
2) Prior skull surgery, particularly that of augmentations, will result in ‘stolen’ scalp stretch and this just be considered in the implant’s design.
3) When uncertainty exists about how large of a skull implant that will fit, a two layer skull implant can be designed in case the total size of the implant will not fit.
Dr. Barry Eppley
Indianapolis, Indiana