
Background: Aesthetic skull augmentations, like any other face and body areas, requires the placement of an implant to create the desired effect. What differentiates such skull augmentations is there are no preformed off-the-shelf implants to do so and the overlying soft tissues (scalp) imposes some natural implant size limitations due to its natural tightness. The first requirement is currently overcome by a preoperative implant design process. Adequate scalp laxity to accommodate the implant, if needed, can be created by a scalp expander prior to implant placement.
There is no accurate method to know precisely whether one’s scalp can stretch enough to allow a skull implant of some size to be placed underneath it. Scalp stretch with undermining varies amongst patients based on their scalp thickness. Skull implants also cover a large surface area in which its volume can add up quickly and the implant’s thickness at its maximal area of projection belies its volumetric impact. It is also important to recognize that the desired use of a small scalp incision does not create the same implant space that a large bicoronal scalp incision with undermining does. (but no patient wants that incision for an aesthetic procedure)
Despite the lack of a known preoperative method to determine whether a skull implant will fit there are some general guidelines. Skull implant volumes of 150ccs are about the maximum for most patients. Thin scalps in females will be less, thicker scalps can be a bit more. A history of hair transplants, particularly with a strip harvest, is usually a strong indicator of limited scalp flexibility. Implant designs that cover more than 1/2 of the skull’s surface or have maximum projections greater than 12 to 14mms at the limits of most scalp’s ability to safely cover over it.
Thus in large skull implants the limitations of the scalp can be overcome by a first stage scalp expander. Getting a large skull implant through a smaller non-bicoronal scalp incision requires a multi-piece skull implant design.
 Case Study: This petite female desired an overall larger head size. She had an existing silicone forehead implant which she felt gave took much upper forehead projection. She also had infraorbital implants which wrapped around the nerve. Of great importance was that she had a prior hair transplant with a strip harvest method.
 The bulge of the forehead implant could be seen at its upper edge as it did not flow naturally into the skull above it….which explains the forehead protrusion that bothered here.
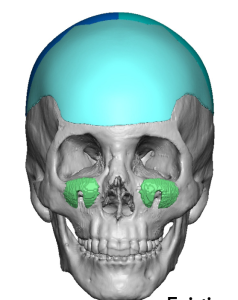
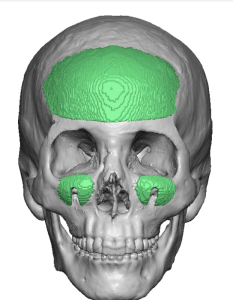
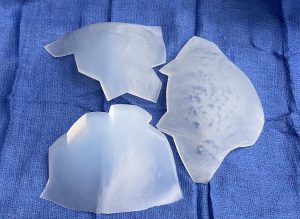
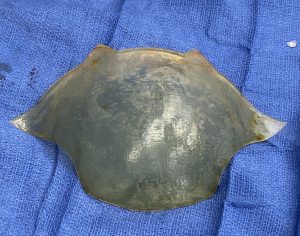
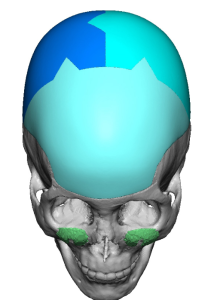 A custom forehead implant was designed that covered 2/3s of her skull’s surface and provided the crown height that she wanted. It had a three piece interconnected design so it could be placed through smaller scalp incisions. Its total volume was 190ccs.
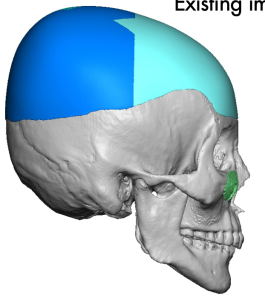 It also extended forward to replace her existing forehead implant with a better transition into the skull courtesy of the implant design.
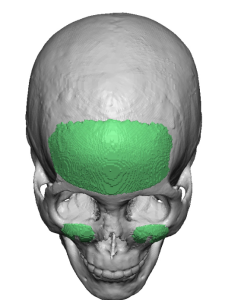
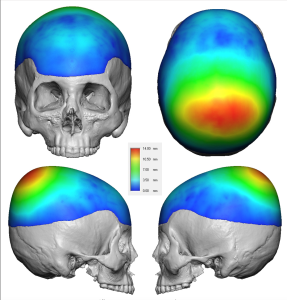 Color mapping of the implant thicknesses showed that the greatest projection is in the crown area.
 Because of the implant’s volume a first stage scalp expander was placed through her existing scalp scar on the back of her head. It was inflated to 190ccs over a 3 month period.
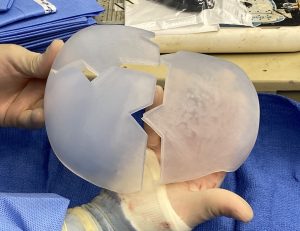 The three piece skull implant was opened during surgery and how it came together was comforted per the design at its interconnecting triangles.
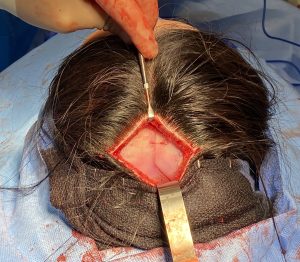
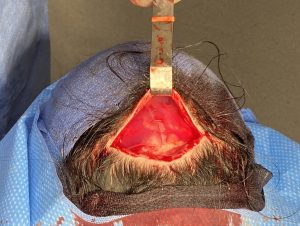 Under general anesthesia her second stage skull augmentation was initially done in the prone position with removal of the tissue expander. The capsule was removed from the bone and releases done around the entire capsule created by the tissue expander. The back two piece of the custom skull implant was put in separately and assembled once inside the pocket with sutures at the interconnecting geometric contact points. A two layer scalp closure was then done over the implant.
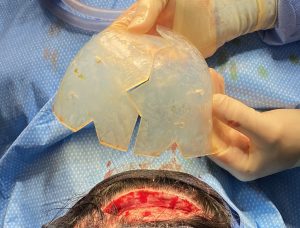
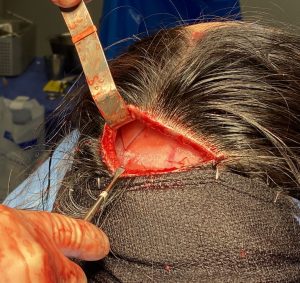 The patient was then moved back into the supine position where through a small incision on the top of her head the pocket was directed forward onto the existing forehead implant…which was then removed. The remaining anterior piece of the custom skull implant was inserted and joined to the already assembled posterior pieces and secured with sutures. Drains were placed on both sides and a two layer scalp closure done with resorbable sutures.
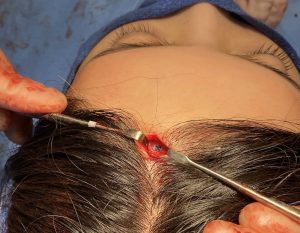 Lastly a small incision was made at the frontal hairline and a single microscrew placed for fixation.
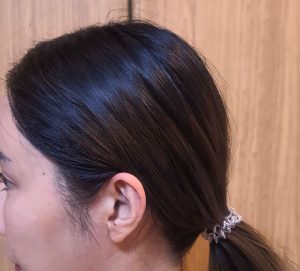
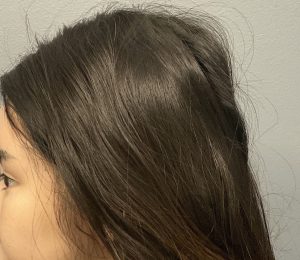
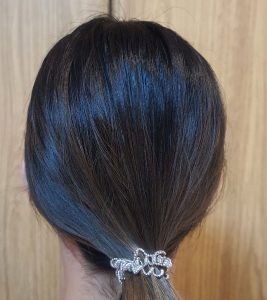
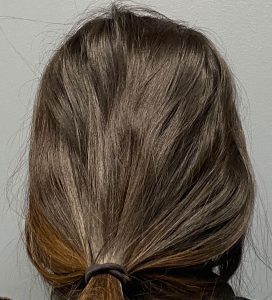 She kept both drains for 5 days and at their removal no facial swelling out bruising was present. The change in her skull shape with the augmentation was readily apparent.
Key Points:
1) The need for a two stage approach to large aesthetic skull augmentations depends on the volume of the designed implant and how much the scalp can stretch to accommodate it.
2) The amount of scalp expansion needed is volumetrically similar to that of the designedskull implant to be subsequently placed.
3) To keep scalp incisions small the skull implant is designed in multiple pieces to be fully assembled once inside the subperiosteal pocket.
Dr. Barry Eppley
World-Renowned Plastic Surgeon