
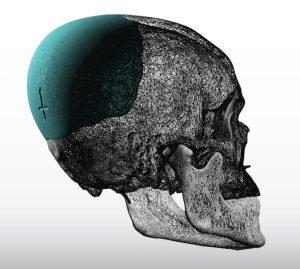
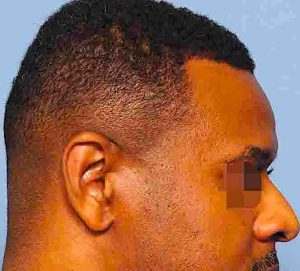
 Treatment for varying degrees of flatness of the back of the head is the most common form of aesthetic skull augmentation. Done today using a custom design approach for the correction the optimal amount of back of head asymmetry and overall augmentation can be obtained. The relevant question with custom skull implants, now that the shape and size of the implant has been adequately addressed through a preoperative design, is how can they placed in the most aesthetic manner. (small incision size)
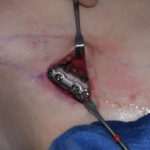
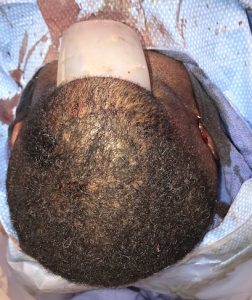
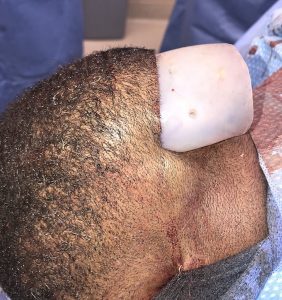
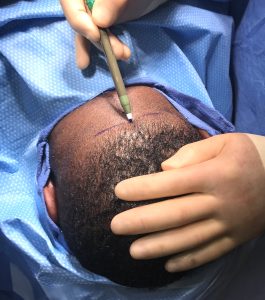 Most back of head skull implants are placed in men which usually means there is limited hair coverage for camouflage. The scalp incision can be placed high in the crown area or low over the nuchal ridge or in a high horizontal neck skin crease. Most men prefer the low incisional technique particularly if they have any semblance of a horizontal neck line/wrinkle.
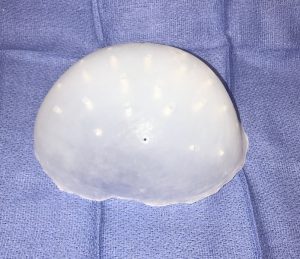
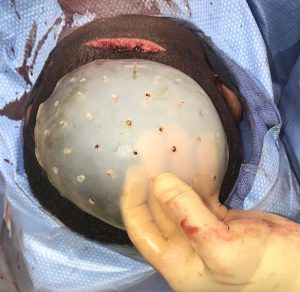
From this incisional approach dissection can start at the lowest point on the bone (nuchal ridge) and proceed to be done superiorly up over the occipital and parietal bones. The length of the scalp incision needed for a silicone skull implant is generally 35% to 40% of its maximum diameter. (e.g., skull implant diameter = 20cms, scalp incision length needed = 7 cms) This will be partially affected by the thickness of the implant as that affects its ability to be folded. (see below)
 Placing the implant through an incision that is much smaller than its diameter requires modification of its structure. This is where solid silicone implants have a major advantage, they have the material property of elastic deformation. This allows them to be folded or rolled for insertion. The vast majority of the time this is done by bringing in the sides and creating a centrally-based roll. This will then allow it to be inserted as a ‘tube’ which slides through the opening with some generous assistance most of the time.
 But once it gets inside the pocket the real work begins. It must now be unfolded throughout its entire perimeter and then positioned onto the bone per the design. Doing so is never easy as it is done virtually blind. The only part of the implant that can be seen is what is viewed through the incision which usually represents less then 15% of the total implant. There are various intraop techniques to unravel the folded implant inside the tight pocket. A midline marker on the bottom of the implant allows it to be positioned low enough and in the midline where it can be secured with screws. A good implant design and placement allows for an improved result with very acceptable scarring.
Dr. Barry Eppley
Indianapolis, Indiana